
Master Bedroom Progress - Painted Wallpaper
We have been making major progress in our Master lately...this will be the first of 4 posts about the projects before the big reveal...so make sure you come back!
I LOVE the look of wallpaper but I am: 1) a bit of a commitment-phobe (except for when it came to marrying my wonderful husband) and 2) renting...which makes wallpaper out of the question. However, I didn't really ask permission to do this to our rented walls either...oh well, nothing a little sand paper and paint and a husband with strong arms can't fix in a few months :)
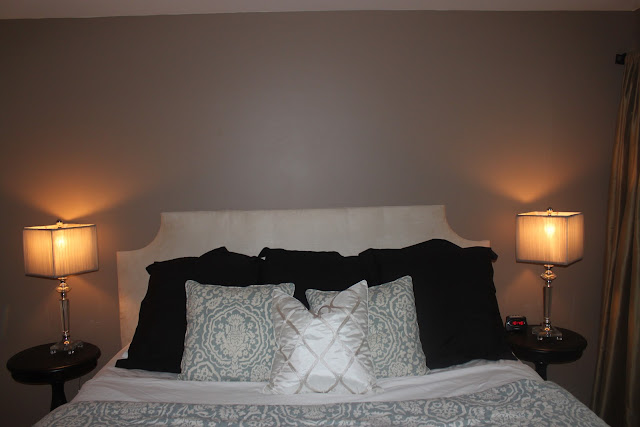
You have probably seen similar painted walls all over the blogsphere and Pinterest, but mine are even better beacuse I designed the stencil! I used the middle pillow on our bed (you'll see in a second) as inspiration for the pattern I wanted repeated (email me if you would like it).
I won't lie to you, this project was not exactly easy and took about 8 hours to complete...but it was worth every minute.
Without further adieu here are some pictures after the wall was complete and the steps I took and things I learned along the way...
Before:


I worked from top to bottom and each time lined up the top of the stencil with the line from the bottom. Be careful to keep it in line horizontally as well.

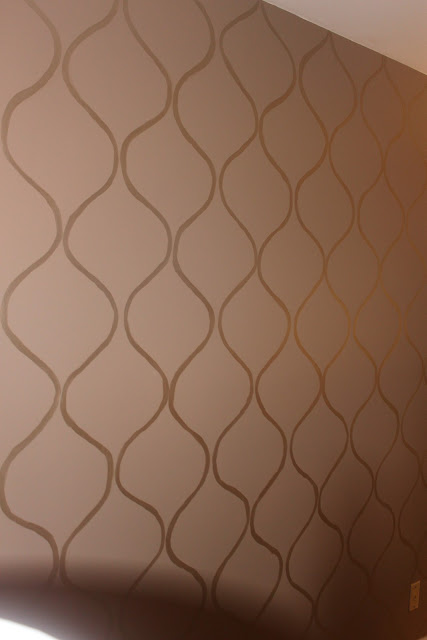
Here is the finished product again! Isn't it lovely? I love it! Just wait until you see the finished space!
Next up:
a DIY Upholstered Bed
Painting Furniture
DIY Curtains and Pillow Shams
I LOVE the look of wallpaper but I am: 1) a bit of a commitment-phobe (except for when it came to marrying my wonderful husband) and 2) renting...which makes wallpaper out of the question. However, I didn't really ask permission to do this to our rented walls either...oh well, nothing a little sand paper and paint and a husband with strong arms can't fix in a few months :)
You have probably seen similar painted walls all over the blogsphere and Pinterest, but mine are even better beacuse I designed the stencil! I used the middle pillow on our bed (you'll see in a second) as inspiration for the pattern I wanted repeated (email me if you would like it).
I won't lie to you, this project was not exactly easy and took about 8 hours to complete...but it was worth every minute.
Without further adieu here are some pictures after the wall was complete and the steps I took and things I learned along the way...
Before:

After:

First, measure your wall and decide how large your stencil should be and how many times you want it repeated. If you are purchasing a stencil the size will be predetirmied, so you may have 1/2 of the image at the top, bottom or sides - that is fine and would happen with wallpaper anyway.
I designed my stencil, so the size was up to me and right now I can't remember the exact measurements. I drew it onto a couple of pieces of paper, cut it and then traced it onto cardboard. Then I taped the two sides together, made sure they were even and got to work! I used a bit of tape on the back to hold the stencil in place, but still needed one hand on it. *be careful when tracing to ONLY use pencil and try not to make your line too dark. I learned my lesson and ended up erasing my lines because they were too dark*


I worked from top to bottom and each time lined up the top of the stencil with the line from the bottom. Be careful to keep it in line horizontally as well.

After you have completed your stenciling (hopefully with a hand much less heavy than mine) start painting! Painting freehand is daunting at first, but part of the beauty of this is: a) you can use a wet cloth to wipe off as you go and b) it doesn't need to be perfect. Every person who has seen this has assumed it's wallpaper and hasn't noticed the imperfections until I tell them! I blended two colors of acrylic art paint and applied it with a long handled artist brush about the width of the lines. My paint was metalic because I wanted that look but this would work with the same color, different finish or two different colors. Here is the finished product again! Isn't it lovely? I love it! Just wait until you see the finished space!

a DIY Upholstered Bed
Painting Furniture
DIY Curtains and Pillow Shams


Wow! Looks great. The colors are perfect!
ReplyDelete